We always run into deadlocks when we need extra space on virtual machines and since the hdd is already created it becomes a problem to re size a disk. lets walk through a fast way of doing so.Using VBoxManage and Gparted
if you find reading as a boring habbit just follow the pictures :)

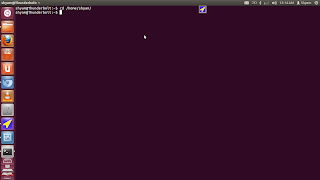
- Open a terminal and CD into your existing virtual disk, the location of the disk can be found out by using step number
- Now create a new disk using
VBoxManage createhd --filename newone.vdi --size 3000
Where newone.vdi is the disk name if you see image above you can make anytype of supported image which means this method can also be used for vmware disks - Now copy contents of the disk which needs to be resize into this one using command
VBoxManage clonehd packed-disk2.vmdk newone.vdi --existing
where packed-disk2.vdmk is the original disk (10 gb )
newone.vdi is the new 30 gb disk - Now open settings of virtual machine in question

- Now find the storage controller and the hdd

this can be used to locate the disk which needs to be resized
Now change this hdd
Remember your old disk still remains so if all this effort fails you can always switch back - Now load the gparted iso file in the virtual machine

Same way the hdd was replaced , but this time choose the cd/dvd controller - Now boot up the virtual machine

press f12 to get above screen then press c to select cd - Now you will see gparted screen for booting

select 1st options and press enter - Now gparted shows you some options like keyboard layout , screen resolution , type of card and how to start x server
my answers were - Dont touch the keymap
- Selected 33 us english
- start of the x server automatically
- resolution os 1024 X 768
- depth 24 bit
- Vesa card

- Now you will see desktop , select Gparted icon

Will give you a screen like this , this point onwards you can right click the partition you want to resize or move and move then. Rules of using Gparted are kinda rigid , but are straightforward - you will have to adjust the partitions according to whats in front and behind the disk
- and move them like a puzzle till you get what you want , the disks can be graphically resized

- Here is how it looked while processing

- Here is how it looked after the partitioning was done

- This is how the disk utility looked after i booted my virtual machine

now after this you can either keep the earlier disk or delete it , If the process goes wrong , then you can always restore you virtual hdd the way it was done in step 5 and you will have restored the hdd
Please do comment :)

No comments:
Post a Comment